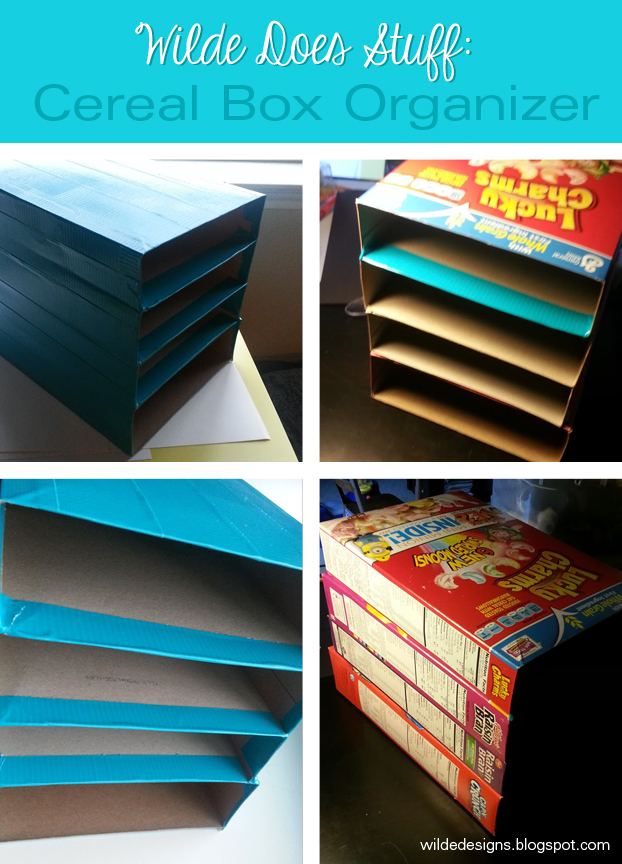
- Cut the top flaps off of the boxes (y'know, the tab-y parts you use to close the cereal when you're using the box). Stack them. Line them up by the front end. I know, this is getting complicated.
- This is optional, but if you use some simple clear tape to wrap around the boxes and hold them together, it can make your life easier.
- If you're using paper, this is where you start gluing and cutting and putting the paper on. Contact paper? Same thing, you just get to skip the glue. Personally I'm all about the duct tape. It comes in pretty colors, and it's easy. When applying the tape, I made sure to overlap the strips over the front of the boxes to "join" them together. The same on the sides - I would have a piece spanning the boxes to give it a little extra structural integrity.
- That's actually all. You stacked your boxes, you covered them with something to hold them together and make them prettier, and now you can throw that puppy on a shelf! Do note that unless you're using heavier duty boxes, you'll want to stack mostly light papers and supplies in them or the boxes will bow under the extra weight.
Comments
Post a Comment